top of page
Search

So, you want to dive into the world of oil painting and come out looking like a seasoned pro? Well, buckle up, because I’m about to share some oil painting tips and tricks that I’ve picked up along the way. Trust me, I’ve made enough mistakes to fill a gallery, but that’s how you learn, right? Whether you’re eyeing a stunning piece for your living room or hunting for that unique gift that screams “I’m artsy,” mastering these techniques will get you closer to your goal.


Getting Started: The Basics of Oil Painting Tips and Tricks


First things first, oil painting isn’t just about slapping paint on a canvas and hoping for the best. It’s a dance between patience, technique, and a little bit of luck. Here’s what I’ve learned:


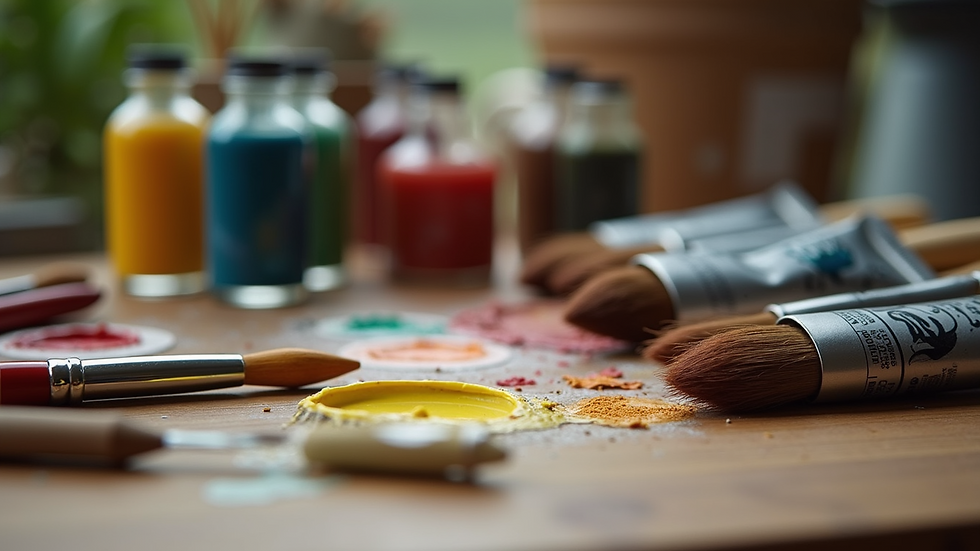
  • Choose the right materials: Invest in good quality brushes, canvas, and oil paints. Cheap stuff might save you a buck but will cost you in frustration.

  • Prep your canvas: A properly primed canvas makes all the difference. It prevents the paint from soaking in and keeps your colors vibrant.

  • Mix your colors wisely: Don’t just grab random tubes and mix wildly. Learn some basic color theory to avoid muddy messes.

  • Thin your paint: Use linseed oil or turpentine to get the right consistency. Thick paint can be fun, but it’s harder to control.


Remember, oil painting is forgiving. You can paint over mistakes once it dries. Speaking of drying...


Close-up view of oil paint tubes and brushes on a wooden table
Essential oil painting materials laid out for a project

Do you let oil paint dry between layers?


Ah, the million-dollar question. The short answer: yes, but it depends. Oil paint dries slowly, which is both a blessing and a curse. Here’s the scoop:


  • Fat over lean: This old rule means each new layer should have more oil than the one beneath it. It helps prevent cracking.

  • Drying times vary: Thin layers dry faster, sometimes in a day or two. Thick layers? They can take weeks.

  • Wet-on-wet technique: Some artists prefer to work wet layers on top of each other to blend colors smoothly. It’s tricky but rewarding.

  • Patience is key: If you want crisp edges or distinct layers, wait for the paint to dry. Otherwise, you risk muddy colors.


Personally, I like to wait at least a week before adding a new layer on thick paint. It’s like letting your masterpiece catch its breath.


Mastering Brushwork: The Secret Sauce


Brushwork can make or break your painting. Here’s how I approach it:


  • Use different brushes for different effects: Flat brushes for bold strokes, round brushes for details, fan brushes for texture.

  • Don’t overwork the paint: Sometimes less is more. Over-brushing can muddy your colors.

  • Experiment with strokes: Try dabbing, swirling, or even scraping paint off with a palette knife.

  • Keep your brushes clean: Dirty brushes are the enemy of vibrant colors.


One trick I swear by is using a dry brush technique to add texture and highlights. It’s like giving your painting a little personality.


Eye-level view of a palette with mixed oil paints and various brushes
Artist’s palette with mixed oil paints and brushes ready for use

Layering Like a Pro: Building Depth and Dimension


Layering is where your painting starts to come alive. Here’s how to do it right:


  1. Start with an underpainting: Use a monochrome color to sketch out your composition. It’s like a roadmap.

  2. Block in colors: Lay down the basic colors and shapes without worrying about details.

  3. Add mid-tones and shadows: This creates depth and volume.

  4. Highlight and refine: Use lighter colors and fine brushwork to bring out details.

  5. Glazing: Apply thin, transparent layers of paint to enrich colors and add luminosity.


Glazing is my favorite. It’s like magic—suddenly, your painting has this glowing, almost 3D effect. Just remember to let each glaze dry before adding the next.


Cleaning Up and Caring for Your Work


Oil painting isn’t just about the fun part. Cleaning up and caring for your tools and artwork is crucial:


  • Clean brushes immediately: Use a good brush cleaner or mild soap. Letting paint dry on brushes is a rookie mistake.

  • Store your paintings properly: Keep them away from direct sunlight and extreme temperatures.

  • Varnish your finished work: It protects the painting and enhances colors. Wait until your painting is completely dry—this can take months.

  • Dispose of solvents safely: They’re toxic, so don’t just pour them down the drain.


Taking care of your materials means they’ll take care of you—and your art will last for generations.


Wrapping It Up: Your Artistic Journey Awaits


Oil painting is a journey, not a race. With these tips, you’re better equipped to create pieces that speak to your soul and maybe even your walls. If you want to dive deeper into oil painting techniques, check out some tutorials and galleries online. Remember, every stroke is a step closer to mastery.


So, grab your brushes, embrace the mess, and paint like nobody’s watching. Your next masterpiece is just a canvas away.


I’ve always been fascinated by landscapes. There’s something magical about capturing the beauty of nature on canvas. But let’s be honest - oil painting landscapes can feel intimidating. The colors, the textures, the light - it’s a lot to juggle. Over time, I’ve learned some tricks and methods that make the process smoother and way more fun. If you’re looking to create stunning oil paintings of landscapes, you’re in the right place. Let’s dive in!


Exploring Landscape Oil Painting Methods


When I first started, I thought painting landscapes was all about copying what I saw. Spoiler alert: it’s not. It’s about interpreting the scene, playing with colors, and telling a story. Here are some landscape oil painting methods that helped me find my groove:


  • Start with a solid sketch: I like to do a quick pencil or charcoal sketch on the canvas. It’s like a roadmap for where everything goes.

  • Block in large shapes first: Don’t get caught up in details right away. Lay down the big shapes and colors to establish the composition.

  • Use a limited palette: This keeps your colors harmonious and your painting from looking like a rainbow exploded.

  • Work from dark to light: Oils are great for layering. Start with darker tones and gradually add lighter highlights.

  • Experiment with brushwork: Try different brushes and strokes to create texture and movement.


These methods aren’t rules set in stone, but they’ve saved me from many a frustrated moment. Plus, they make the whole process feel more manageable.


Eye-level view of a canvas with a rough landscape sketch
Starting a landscape oil painting with a sketch

What are the three rules of oil painting?


Ah, the classic three rules. When I first heard about these, I thought, “Great, more rules!” But they’re actually pretty helpful:


  1. Fat over lean: This means each new layer of paint should have more oil than the one beneath it. It helps prevent cracking as the painting dries.

  2. Drying time matters: Oil paint takes its sweet time to dry. Be patient and plan your layers accordingly.

  3. Use quality materials: Cheap brushes and paints can be frustrating. Investing in good supplies makes a huge difference.


Following these rules has saved me from many disasters, like cracking paint or muddy colors. It’s like giving your painting a solid foundation to stand on.


Close-up of oil paint tubes and brushes on a wooden table
Essential oil painting materials including brushes and paint tubes

Mastering Color and Light in Landscapes


Color and light are the heart and soul of any landscape painting. I used to struggle with making my scenes look alive. Here’s what helped me:


  • Observe the light source: Is it morning, noon, or sunset? The light changes everything.

  • Use warm and cool colors: Warm colors (reds, yellows) come forward, cool colors (blues, greens) recede. This creates depth.

  • Mix your own colors: Don’t rely on pre-mixed tubes. Mixing gives you more control and uniqueness.

  • Add highlights last: The sparkle of sunlight or glint on water makes your painting pop.


One trick I love is squinting at the scene or photo. It simplifies the shapes and colors, helping me focus on the big picture instead of tiny details.


High angle view of a landscape painting showing vibrant colors and light effects
Vibrant oil painting of a landscape with dynamic light and color

Tips for Texture and Detail


Texture can make or break a landscape painting. I’m not talking about painting every leaf or blade of grass. Instead, it’s about suggesting texture to give life to your scene.


  • Use palette knives: Great for rocks, tree bark, or rough ground.

  • Dry brush technique: Drag a dry brush with little paint over the canvas for a scratchy effect.

  • Layering: Build texture by layering thick and thin paint.

  • Vary your brush strokes: Short dabs, long sweeps, or stippling can mimic natural textures.


Don’t be afraid to get messy. Sometimes the best textures come from happy accidents.


If you want to take your landscape paintings to the next level, I highly recommend checking out resources that focus on oil painting techniques for landscapes. They offer practical advice, step-by-step tutorials, and inspiration that can save you hours of trial and error. Plus, learning from someone who’s been there makes the journey less lonely and way more fun.


Bringing It All Together: Your Next Landscape Painting


Now that you’ve got some methods, rules, and tips under your belt, it’s time to get painting. Remember, every artist’s journey is unique. Don’t stress about perfection. Embrace the process, the mistakes, and the surprises. Your landscape oil painting will be stunning because it’s yours.


If you’re looking for unique, hand-painted landscapes to brighten your space or gift someone special, keep an eye out for original works. There’s something truly special about owning a piece that captures the beauty of nature through the eyes of an artist.


Happy painting!


P.S. If you ever feel stuck, just remember: even the greats started with a blank canvas and a lot of paint on their hands.


If you’ve ever stared at a blank canvas and thought, “How on earth do I even start?” you’re not alone. Oil painting can feel like a mysterious beast at first. But trust me, once you get the hang of a few essential oil painting tips, it’s like unlocking a secret door to a world of color, texture, and endless creativity. I’m here to share what I’ve learned on my own messy, paint-splattered journey. So grab your brushes, and let’s dive in!


Getting Started with Essential Oil Painting Tips


First things first - you need the right tools. I know, I know, it’s tempting to just grab whatever paint and brushes you find lying around. But investing in decent quality oil paints and brushes will save you a lot of frustration. Here’s what I recommend:


  • Oil paints: Start with a basic set of primary colors plus white and black. You can mix almost any color from these.

  • Brushes: Get a variety of shapes and sizes - flats, rounds, and filberts. Synthetic brushes are fine for beginners.

  • Canvas or board: Pre-primed canvases are easiest to work with.

  • Palette and palette knife: For mixing colors and adding texture.

  • Mediums: Linseed oil or walnut oil to thin your paint and speed drying.


Once you have your supplies, set up a comfortable workspace with good lighting. Natural light is best, but a daylight lamp works too. And don’t forget to wear old clothes or an apron - oil paint is notoriously stubborn to wash out!


Close-up view of a wooden palette with mixed oil paints and brushes
Palette with oil paints and brushes ready for painting

Now, before you start slapping paint on the canvas, here’s a golden rule: patience is your best friend. Oil paint dries slowly, which is both a blessing and a curse. It lets you blend colors beautifully but also means you have to wait between layers. Resist the urge to rush!


Why These Essential Oil Painting Tips Will Change Your Game


Here’s where things get fun. I’m going to share some practical tips that helped me go from “What is this blob?” to “Hey, that kinda looks like a tree!”


  1. Start with a sketch: Use a pencil or thinned paint to outline your composition. It’s like a roadmap for your painting.

  2. Work from dark to light: Oils are transparent when thin, so build your painting in layers, starting with dark colors and gradually adding lighter tones.

  3. Use the fat-over-lean rule: This means each new layer should have more oil than the one beneath it. It prevents cracking as your painting dries.

  4. Experiment with brush strokes: Don’t be afraid to try different textures - dabbing, swirling, or even scraping paint off with a palette knife.

  5. Keep your brushes clean: Wipe them often with a rag and use brush cleaner or mineral spirits to avoid muddy colors.


And here’s a little secret: sometimes the “mistakes” you make turn into your favorite parts of the painting. Embrace the happy accidents!


What is the Grisaille Technique?


Okay, now for a fancy term that sounds way more complicated than it is. Grisaille is a classic oil painting technique where you paint your entire image in shades of gray first. Think of it as a black-and-white underpainting.


Why bother? Because it helps you focus on the values - the lights and darks - without getting distracted by color. Once your grisaille layer is dry, you glaze thin layers of color over it. This creates a rich, luminous effect that’s hard to achieve otherwise.


Here’s how to try it:


  • Mix black and white paint to get a range of grays.

  • Paint your composition focusing on shadows and highlights.

  • Let it dry completely.

  • Apply thin, transparent layers of color on top.


It’s a bit like building a painting in two acts. Grisaille gives your work depth and a professional polish. Plus, it’s a great exercise to train your eye for value.


Eye-level view of a canvas showing a monochrome grisaille underpainting of a landscape
Grisaille underpainting showing shades of gray in a landscape

Layering and Blending: The Heart of Oil Painting


One of the things I love most about oil painting is how you can layer and blend colors right on the canvas. It’s like a dance between control and spontaneity. Here’s how to make the most of it:


  • Wet-on-wet: Apply wet paint on top of wet paint for smooth blends. This is great for skies or soft transitions.

  • Wet-on-dry: Let the first layer dry before adding another. This keeps edges sharp and colors distinct.

  • Glazing: Use very thin, transparent layers of paint mixed with medium to add depth and richness.

  • Scumbling: Drag a dry, lighter color over a darker layer to create texture and highlights.


Remember, blending is all about timing. If the paint is too dry, it won’t mix well. Too wet, and you might end up with a muddy mess. Practice makes perfect here.


How to Fix Common Oil Painting Problems


Let’s be honest - oil painting isn’t always smooth sailing. I’ve had my fair share of disasters. But don’t worry, most problems have simple fixes:


  • Paint too thick and cracking? Thin your paint with medium or mineral spirits.

  • Colors look dull? Clean your brushes and use fresh paint. Sometimes old paint loses vibrancy.

  • Canvas too shiny or slippery? Use a rougher canvas or add a layer of gesso.

  • Paint not drying? Make sure you’re using proper mediums and not too much oil.


If you mess up, you can always scrape off the paint with a palette knife and start again. Oil paint is forgiving if you’re patient.


High angle view of a messy artist’s palette with mixed oil paints and a palette knife
Artist’s palette showing mixed oil paints and tools for fixing painting issues

Why I Keep Coming Back to Oil Painting


After all the spills, smudges, and hours of waiting for paint to dry, why do I still love oil painting? Because it’s magical. The way colors glow, the textures you can create, and the endless possibilities keep me hooked. Plus, sharing my work with others who appreciate it is incredibly rewarding.


If you want to explore more about oil painting techniques, I highly recommend checking out resources and artists who inspire you. Every brushstroke is a step on your own artistic journey.


So, whether you’re looking to add a unique piece to your home, find a special gift, or just try something new, oil painting is a fantastic way to express yourself. And hey, if I can do it, so can you!


Happy painting!


© 2023 by Artist Corner. Proudly created with Wix.com

bottom of page